Whitewash Brick – An Easy How to Guide
A home exterior of red bricks is a popular choice among homeowners. They’re relatively low maintenance, durable and have a classic look that never goes out of style. However, over time, bricks can begin to look dirty, dull and dingy – and that’s where whitewashing comes in.
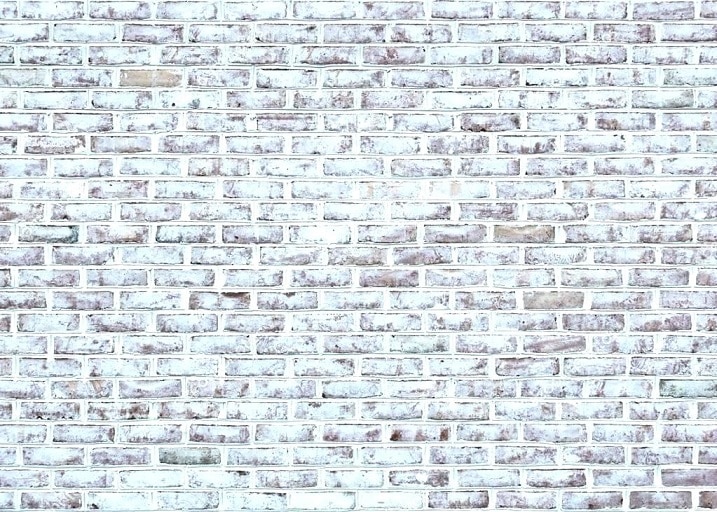
Whitewashing brick is a process by which you apply a particular type of paint mixture to the bricks, giving them a smooth and bright appearance that’s often mistaken for white brick exterior. The wash is a mixture of white latex paint and water, which creates a thin and translucent coating for your wall.
And perhaps best of all, the process to whitewash a brick wall is something that anyone can do. Looking for another way to spruce up your brick wall? Check out this guide on doing a german smear and this guide on limewashing bricks.
Why Should you Whitewash Your Brick Wall?
From smaller projects like whitewashing bricks around your fireplace to something more extensive like your patio or house’s exterior, the process is simple and the results are striking. Generally, homeowners do so to modernize the look of their brick homes without spending a lot of money.
Whitewashing can give your home’s exterior a fresh new look while retaining the brick’s natural texture. Another reason is to protect your brick walls from moisture, mold, bug infestations and harsh weather, which can cause deterioration overtime. The solution contains antibacterial properties and creates a barrier for added protection.
How to Whitewash Brick – Step by Step
Step One – Clean Your Brick Wall
Whitewashing a dirty wall will give you a dull, cloudy appearance that’s highly undesirable. And although bricks are known for their sturdiness, they can just as easily be damaged if harsh chemicals are used for cleaning. Pressure washing can also damage the material, so it’s important not to use an overly aggressive washing routine that could cause more harm than good.
Before cleaning, ensure all cobwebs and dust are removed by vacuuming or feather dusting your wall. Once your bricks are free from debris, it’s time for a thorough clean using soap and salt:
Soap and Salt – The Most Effective Cleaning Solution
Soap and salt is a cost-effective and convenient way to clean off dirt or grime. Make this solution by mixing one part dish soap with one part salt until you get a paste-like consistency. Apply to each brick with a damp cloth, and use a bristle brush to gently scrub away dirt gradually.
After scrubbing and removing stains, rinse the paste away with a garden hose with a spray attachment or with a cloth with warm water. If necessary, you can repeat this cleaning process.
Step Two – Cover Your Surroundings
Place drop cloths around your wall to prevent the wash from splattering on floors, siding and landscaping. To whitewash brick, you’ll want to cover furniture and other items in the room with plastic coverings to protect them.
After your drop cloths are laid down, apply painter’s tape to your windows and door frames. Painter’s tape is crucial as it ensures a crisp, clean line between the whitewash and brick.
Also, make sure all your tools are ready to go before you start with the painting job.
Step Three – Remove Paint Residue from Your Brick Wall
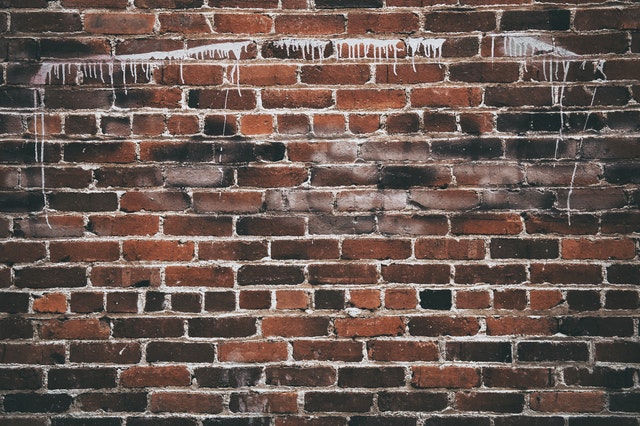
After the cleaning process, you may notice peeling paint or blistering from your red brick wall. Blisters are a common problem among older homes with thicker layers of paint, and depending on the paint, can contain toxic lead. Lingering paint can cause the whitewash not to adhere to your brick, causing air pockets that eventually fall off.
If your brick walls contain toxic lead paint, you’ll want to contact a local hazardous materials cleanup expert for assistance. However,
for paint flakes which aren’t lead-based, you can use a putty knife or scraper to remove them.
Read about the differences between interior and exterior painting here.
Step Four – Prep Your Whitewash Mixture
Generally, whitewash is created by mixing equal parts of water and latex paint in a bucket. However, if you prefer your red brick wall to have a lighter shade of white, you’ll need to pour more water in your mixture. You can adjust this ratio depending on how light or dark you want the effect of the whitewash to be.
Start with equal parts water and paint, and stir until you get a creamy consistency. Test your solution by applying a small amount of whitewash to your brick wall in an inconspicuous area.
Step Five – Whitewash Brick for a Gorgeous, Sleek FInish
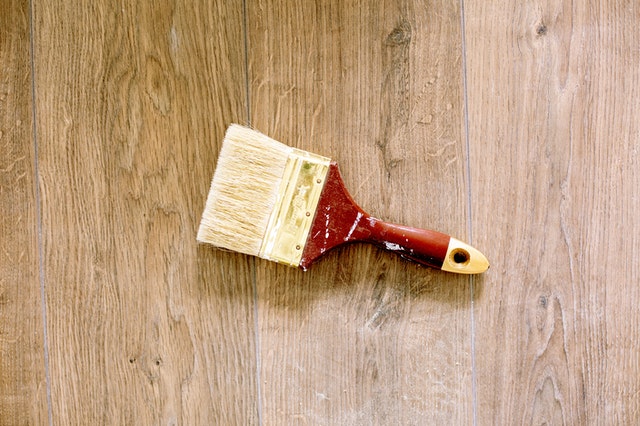
Begin by spraying your brick wall with water in a spray bottle, as this will help your mixture stick to the wall. Next, dip your brush in your whitewash mixture and remove excess leftover paint before application. Do so by scraping your brush against the rim of your bucket and pull off any paint clumps from the bristles.
During application, it helps to whitewash your brick wall in smaller sections. Begin by brushing your grout lines and using long, smooth brush strokes to apply the paint over your brick surface evenly. Use a smaller paint brush with thinner bristles to paint harder areas that require a bit more dexterity.
After you’ve brushed all your bricks, allow the mixture to dry overnight. By the morning, you should have a whitewashed brick wall with a spotless, beautiful shade of white.
Tips and Tricks for Whitewashing Brick
Some brick areas to whitewash may be challenging to reach, while others will have stains so tough that cleaning with soap and salt won’t do. Perhaps you’re not sure what shade of white is best for your exterior or interior brick wall. If you’re doubtful about your whitewash brick project, here are a few tips to help you get the job done:
Boric Acid for Cleaning – If wall stains are especially tough, add a tablespoon of boric acid powder into a gallon of warm water. Dip your cleaning brush and scrub off any residue or stains from your wall. When acid washing your bricks, remember to wear rubber gloves as boric acid can harm your skin.
Keep Different Brushes – Keep various paintbrushes on hand for different project needs. You may want to use a small and thin brush for grout lines and hard-to-reach spots while using a broad brush on the brick’s surface area. A paint roller may also come in handy, should you need to paint hard to reach places on your wall.
Check for Potential Obstructions – Consider the height of the wall and potential obstructions that may prevent you from applying your whitewash. If you’re not able to reach it by yourself, consider the services of a lift rental.
Brick Fireplace Prep Work – For a brick fireplace, tape kraft paper around your mantel’s edges and protect your firebox by taping over it.
Make Even Batches – Make your whitewash in a large enough batch to ensure your mixture’s ratios are consistent. Several smaller batches, in contrast, may result in different shades of white. Consider purchasing a large-volume paint bucket if you plan to whitewash your entire brick wall or structure.
Lastly, take your time. You want an even consistency for a beautiful, long-lasting finish!
Whitewashing Brick Walls – An FAQ
How long does whitewash last on brick?
If the application is correct, the effects of this mixture can last anywhere from 20-30 years. Besides lasting a long time, little maintenance is required to maintain a whitewashed brick wall.
Do you have to seal whitewash?
To maintain and maximize your whitewash brick’s lifespan, it will need to be sealed after application. After your whitewash has dried, apply a water-based sealant on your wall’s surface with a brush. Your brick wall will now be able to withstand natural weather elements and prevent moisture from permeating the surface.
Is whitewashing bad for brick?
A whitewashed brick wall isn’t only known for its classical appearance but also to protect your wall. Moisture from rain and snow can damage brick over time. Whitewash acts as a barrier between your bricks and the outside elements, protecting the material.
What’s the difference between whitewash and limewash?
The difference between the two lies in their ingredients. While whitewash is a mixture of water and paint, limewash is composed of crushed hydrated lime mixed with water. Whitewash provides a brighter finish with multiple colours to choose from and is permanent. Limewash, in contrast, can be removed without damage to the brick wall.
Newline Painting – Professional Painters for Your Melbourne Home
Whether you’re a DIYer who needs a helping hand or someone utterly clueless about a paintbrush, Newline Painting is the company for you. We offer free quotes and aim to provide our customers with outstanding painting services at affordable prices.
We offer interior and exterior painting services in Melbourne for your home, including stairs, cabinets, windows and doors. Call us today at 1300 991 368, or book your free quote online to get started. We serve various areas in Melbourne including Bentleigh, Clayton, Glen Iris, Mount Waverley, and South Melbourne.
Need to spruce up your walls with a new coat of paint? Read our guide on how to fix cracked and peeling paint and get started!


