Updated for 2025: This guide has been refreshed with updated limewashing techniques, expert insights, and practical tips to help you achieve a professional-quality finish that lasts.
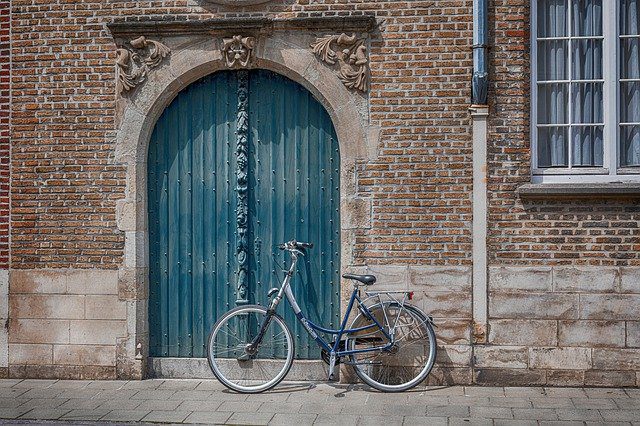
Brick homes are a popular choice for homeowners due to their durability, timeless appeal, and ability to withstand the elements. While brick is generally more expensive than other exterior materials, its classic look never goes out of style.
However, over time, bricks can accumulate dirt, stains, and even mold due to their porous nature. Regular maintenance, including cleaning and spot checks for moisture, helps preserve their appearance and longevity.
One of the best ways to refresh aged or weathered brick is limewashing—a cost-effective, breathable finish that enhances brick surfaces while providing long-term protection. If you’re exploring alternative options, consider whitewashing for a softer finish or a German smear for a more textured, rustic appearance.
Limewashing Brick – Understanding How it Works
Limewash is a solution made from crushed, burned limestones and water, making a lime putty. The heating of limestones changes the properties of the stone, creating a softer and more absorbent material that can be applied to porous surfaces.
A limewash finish provides a durable coating that protects your surface from the elements. And unlike paint, it penetrates the brick and cannot peel off. Many apply this solution not only to their brick homes, but also to concrete and stone walls.
Because lime wash is relatively easy to produce, many homeowners mix their own to save on costs. More often than not, most mixes involve some combination of water and slaked lime (calcium hydroxide). Lime washing bricks isn’t just exclusive to residential homes, it’s often used as a finish for churches, government and commercial buildings.
The Pros and Cons of Limewash Brick
Limewash certainly isn’t going anywhere, and in fact, it’s becoming more popular. For an old European look that gives your home character, lime wash for bricks may be the perfect choice for you and your brick home.
However, like all exterior materials, limewashed brick also has its fair share of problems. Before you get the old brush out and start, take a look at our list of pros and cons to see if limewashing is right for you.
Pros:
It Doesn’t Smell and Contains low Amounts of VOC
Limewash is less toxic and doesn’t give off a strong odour like paint does. Additionally, it contains low levels of volatile organic compounds (VOCs), making it an environmentally-friendly solution.
Because its non-film-forming, it will not peel or flake off over time. It’s breathable, which allows the surface to “breathe” and helps prevent moisture and water damage.
Here are some tips on how to deal with the smell of paint.
Lime Washing Bricks is Affordable and Accessible
Compared to other exterior solutions, limewashing is relatively affordable and accessible. You can find all of the ingredients you need at your local hardware store, and the process is simple enough that most homeowners can do it themselves.
To coat an entire brick house, you’ll only need $10 to $80 worth of supplies. Hydrated lime, which comes in 50lbs bags, only cost $50 bucks and is enough to paint an average-sized home. Since water is free, you won’t have to worry about spending too much money.
Its Low Maintenance
As limewash works to penetrate your bricks, it does not create a film on the surface. Unlike a painted wall, which requires yearly touch-ups, a lime wash requires minimum maintenance. Once it’s applied, you can forget about it and enjoy your beautiful brick home for years.
If you prefer a weathered brick exterior to your home, limewash will help you achieve that effect. Limewash brick does fade over time, giving your home a weathered, and natural look.
Limewash is Highly Alkaline
Limewash’s high alkalinity sterilises your bricks to prevent moulds, mildews and other unwanted bacteria. This makes limewash an ideal choice for areas like bathrooms and kitchens.
It also resists insect damage, stopping wood-boring beetles and other pests from infesting your walls.
Limewash Brick Walls are Weather Resistant
Home exteriors that have been exposed to harsh weather conditions, like rain and snow, can take a beating. Limewash can withstand these conditions and will not crack or chip away, which will keep curbside appeal high.
Cons:
Batch Inconsistencies
When making several smaller batches of limewash, they’re likely not going to be identical. There will be subtle variations in the mix, which can change its finished appearance through uneven application.
Limewash Cannot be Applied to Painted Brick
Since limewash works to penetrate your bricks, it will not adhere to a painted brick that already has coating. Always apply on brick surfaces not contain painting for the best results.
Brick with Lime Wash Should be Renewed Every Few Years
Since limewash bricks eventually fade, they will need to be reapplied every 5-7 years. However, this is a simple process that most homeowners can do themselves.
If you want to add a timeless and weatherproof finish to your brick walls but also explore other outdoor solutions, consider combining them with natural stone or pavers. Paving supplies AU has a huge range of stone wall cladding that will match with limewashed bricks and add depth and texture to your outdoor spaces.
Now let’s get into the step-by-step process of limewashing your bricks.
Why Limewashing is Gaining Popularity
Limewashing is becoming increasingly popular among homeowners, interior designers, and architects for several reasons:
Timeless, Customizable Look: Limewash creates a weathered, vintage finish that blends beautifully with modern and traditional architectural styles.
Eco-Friendly Alternative to Paint: Unlike synthetic paints, limewash is made from natural materials, making it a more sustainable option.
Aging Gracefully Over Time: Unlike traditional paint that fades unevenly, limewash develops a patina, enhancing its aesthetic appeal as it weathers.
Easier to Refresh Compared to Paint: Unlike exterior paint that may peel or crack, reapplying limewash every few years is simpler and requires less preparation.
Whether you’re restoring a historic home or modernizing an exterior, limewash is an excellent option for achieving a distinctive look while protecting your brickwork.
Common Mistakes to Avoid When Limewashing Bricks
Applying limewash is a relatively simple DIY project, but certain mistakes can lead to an uneven or short-lived finish. Here’s what to avoid:
Skipping Surface Preparation: Dirty or damp bricks can prevent proper adhesion. Always clean and let the bricks dry before applying limewash.
Applying Too Thick of a Coat: Thick limewash may dry unevenly and crack over time. Apply multiple thin coats instead.
Not Testing the Mixture First: The final appearance of limewash can vary based on the consistency and number of layers. Always test a small, inconspicuous area before committing to the full project.
Painting Over Previously Coated Brick: Limewash doesn’t adhere well to painted or sealed surfaces. If your bricks have been painted before, stripping the paint first is essential.
Avoiding these mistakes will help ensure a smooth, even, and long-lasting limewash finish.
Steps to Limewashing Bricks

The good news is that lime washing bricks is DIY friendly, and with the proper instructions and materials, you’re good to go. Let’s go over the steps:
Step One – Clean your Bricks
The first step is to clean your bricks and remove any dirt, dust or other debris. To do this, hose down your bricks with water and let it dry naturally. You can use natural ingredients like baking soda or vinegar or an all-purpose cleaner to help scrub away adamant stains.
Step Two – Put On Your Safety Gear
Limewashing bricks can be dangerous if mishandled, as putty exposed to your skin can cause burns. Before mixing, wear gloves, goggles and a dust mask to avoid contact.
Step Three – Mix your Ingredients to Create Lime Putty
When mixing your lime wash, maintain a ratio of 15-20% hydrated lime and 80-85% water. Mix your ingredients in a bucket, and make sure the consistency isn’t too thick or thin – your lime wash should have the thickness of whole milk.
We recommend making larger batches to ensure that the consistency doesn’t change throughout your project.
Step Four – Limewash Bricks Through Even Application
Using a roller, or paintbrush, apply a thin coat of lime wash onto your bricks and completely cover them. Use a vertical motion from top to bottom, and continue to stir your limewash mixture as you go along. Once limewash has been evenly distributed to your bricks, it will gradually whiten.
Step Five – Let it Dry
Allow your lime wash to dry for 3-5 days before applying a second coat. Weather conditions, like high humidity or very low temperatures, can play a role in the drying time, so be patient. It is recommended, therefore, to paint on an overcast day.
Step Six – Apply Multiple Coats when Limewashing Bricks
Every coat of limewash you brush on causes your brick color to change and become more opaque. For a finished look, we recommend applying 3-5 coats of limewash – waiting 24 hours in between coats.
How Limewash Compares to Other Brick Treatments
Limewashing isn’t the only way to enhance the appearance of bricks. Here’s how it compares to similar treatments:
Limewash vs. Whitewashing: Whitewashing is a diluted paint solution that sits on the surface, while limewash penetrates the brick for a longer-lasting finish. Whitewash often requires more maintenance.
Limewash vs. German Smear: German smear involves applying a mortar mixture, creating a heavier texture. Limewash, on the other hand, provides a softer, more natural look.
Limewash vs. Painted Brick: Paint creates a solid, opaque finish, while limewash is more breathable and allows bricks to retain their natural texture. Painted brick requires more maintenance as it can peel and trap moisture.
Understanding these differences helps you choose the best finish for your home’s aesthetic and maintenance preferences.
Limewash for Bricks – Is it Reversible?
Limewash can be reversed, but it depends on how deep the lime has penetrated your bricks. This means five coats of limewash will be harder to remove than if you had only applied one coat. Older brick walls with limewash will also prove more challenging to reverse.
Your best options for removal are using a pressure washer to power wash your exterior or through sandblasting. Alternatively, you can use a stiff brush with an acidic cleaning agent like vinegar for its removal.
For the best results, you may need the services of a limewash removal company. They will have the necessary tools and know-how to remove your limewash efficiency and correctly.
If you’re considering lime washing your bricks to add protection and curb appeal, these are the steps you’ll need to follow. With a little bit of elbow grease and by being patient with the drying process, you can achieve beautiful results that will last for years. While there are a few drawbacks to lime washing your bricks, the benefits are too many to ignore. Also, remember that DIY painting anything can be a bit tricky. So, always make sure to consult a professional or study our many DIY painting guides.
Newline Painting – Premium House Painting Services at Affordable Prices
If you want to give your whole home a new look, Newline Painting is the best choice for exterior and interior painting in Melbourne, whether you are in Berwick, Collingwood, Glen Waverley, North Melbourne, or South Yarra among many other locations.
Whether it’s a complete transformation or just a refresh we, as professional painting experts in Melbourne, can work with you to get the look you want – and at an affordable price. Get in touch today by contacting 1300 044 206, and let us show you what we can do!
Looking to modernise other parts of your home like your window frames? Read our window frame painting guide to learn more!