A standard epoxy garage floor in Melbourne usually takes 2 to 7 days to install. You can generally walk on it after 1 to 3 days, and full vehicle use waits about 7 days. In a cold garage that window stretches out, because the coating will look finished long before it has actually cured.
That gap between looks done and safe to use is where most of the confusion starts. A floor can feel dry underfoot, pass a quick visual check, and still be too soft for tyres, hot loads or chemical resistance, which happens more often than people expect in Melbourne’s variable climate.
Table of Contents
- Epoxy Garage Floor Timelines in Melbourne
- Each Stage of the Job and How Long It Actually Takes
- Melbourne Conditions That Shift Every Timeline
- DIY Versus Professional Install Timelines
- Faster Coatings and What They Actually Trade Away
- Planning Your Two-Week Garage Downtime
- What to Look for in a Melbourne Epoxy Contractor
Epoxy Garage Floor Timelines in Melbourne
A garage floor epoxy job in Melbourne usually runs 2 to 7 days from prep through to a usable finish, and the gap between a floor that looks done and a floor that is safe for vehicles is where the schedule gets misread. Prep alone can take 4 to 8 hours. Each coat and cure stage then adds 6 to 24 hours per coat before the floor is ready for the next step (How long does it take to epoxy garage floor). Australian guidance also points to about 7 days for a full cure, so a garage can look finished a week before it is hard enough for tyres, hot loads and chemical resistance.
Melbourne makes that difference obvious. A garage in South Yarra, a coastal property in Brighton and a period home in Kew can all take the same epoxy system, and the slab temperature, humidity and ventilation in each one will still shift the timing. Cold concrete in the morning slows the chemical reaction down, which leaves the coating vulnerable for longer.
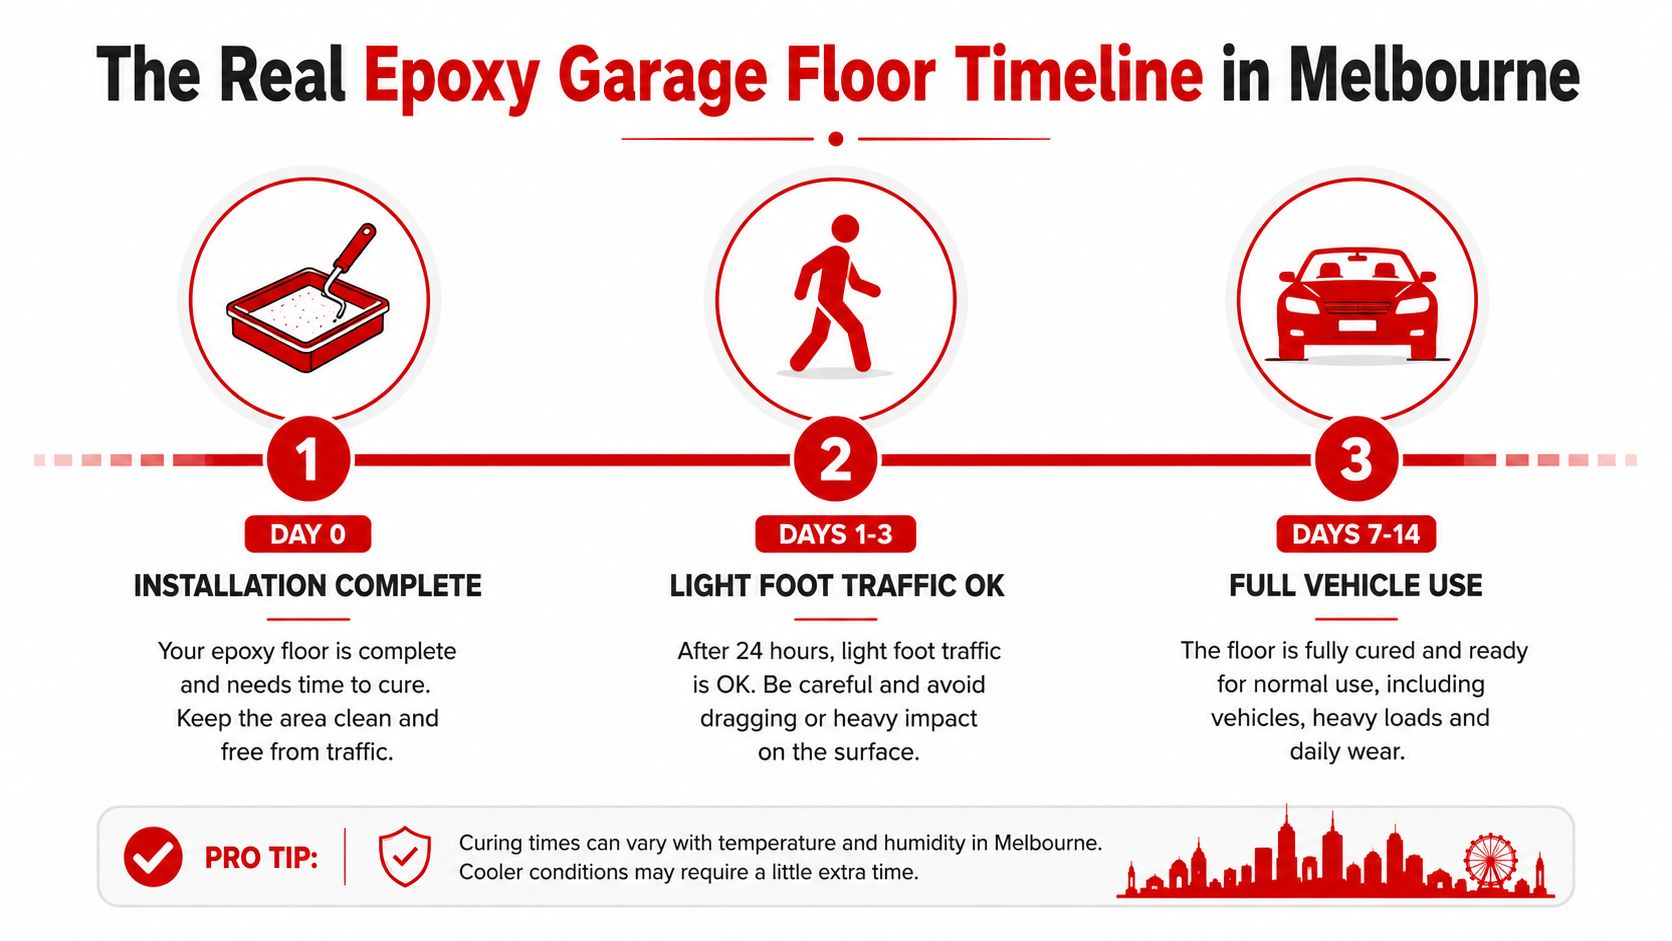
A floor can be dry to handle or walkable and still be nowhere near ready for a car. Rust-Oleum’s Australian EpoxyShield datasheet lists 16 hours dry to handle, 48 hours dry to recoat and 7 days fully cured, with the working time changing as the temperature changes (Rust-Oleum EpoxyShield datasheet). Keep that split in your head when you plan the week, because the finish looks complete long before the coating reaches full hardness.
Practical rule: treat the first couple of days as access time, not normal-use time.
For Melbourne homeowners that usually means a short interruption where the slab is warm and the garage is well ventilated, or a longer restriction where the concrete stays cold. For a broader look at coating types and what to expect from the process, see Newline Painting’s epoxy floors guide.
Each Stage of the Job and How Long It Actually Takes
Most of an epoxy job is preparation. The first few hours go into checking the slab, grinding or blasting the surface, repairing cracks and joints, and confirming the floor is dry enough to coat. Skip any of that and the coating flakes, blisters, or stays soft in patches, usually somewhere you will notice it every time you park.
Where the time goes
Mechanical preparation is the longest visible stage. On a typical Melbourne garage slab our crew can spend several hours on diamond grinding, edge work and dust extraction before any resin goes down. Crack repair and patching add more time again if the slab has old movement, saw cuts or tired control joints.
A floor that looks clean isn’t necessarily ready. Epoxy needs a sound, open profile to bite into.
Once the substrate is ready the coating stages move faster, though they still need the right windows. The first coat has to cure enough before recoating, and manufacturer guidance commonly puts that recoat wait anywhere from 10 to 36 hours before the next layer goes on (Lowe’s epoxy garage floor guide). A floor laid on Friday afternoon is often not stacked, sealed and ready for a vehicle until the following week.
| Stage | Typical duration | Notes |
|---|---|---|
| Slab inspection and moisture check | 30 minutes to 1 hour | Confirms whether the floor is suitable before work starts |
| Mechanical prep | 2 to 5 hours | Diamond grind or shot blast, plus dust removal |
| Crack and joint repair | 1 to 3 hours | Depends on slab movement and existing damage |
| Primer or moisture barrier | 1 to 2 hours | Used where the slab needs extra control |
| Base coat | 1 to 2 hours | Applied after prep and repairs are complete |
| Decorative flake broadcast | Same day as base coat | Happens while the coat is still open |
| Topcoat | 1 to 2 hours | Locks in the finish and improves wear resistance |
| Final cure | About 7 days | Full hardness and vehicle readiness take time |
Newline Painting’s epoxy floor painting service follows the same basic order, prep first, coating second, cure last. That sequence does not change because the garage looks simple.
Melbourne Conditions That Shift Every Timeline
Melbourne weather can lengthen or shorten the schedule more than the product brochure suggests. Epoxy cures by chemical cross-linking rather than simple evaporation, so the slab temperature matters as much as the air temperature does. In a cold bayside garage in Brighton, or a shaded Kew driveway, the floor stays restricted longer than the label’s best case.
The four factors that matter most
Slab temperature is the big one. If the concrete is cold the reaction slows, even when the room feels comfortable enough to work in, which is why a morning application can behave quite differently from an afternoon one in the middle of winter.
Ambient temperature comes next. Cooler air means a slower working life and a longer cure, while hotter conditions shorten the pot life and push the crew to move faster so the mix does not get overworked. Humidity adds another layer, because a damp garage interferes with the surface set and with ventilation.
Ventilation rounds out the list. Air movement helps the coating stabilise. Poor airflow traps moisture and stretches the restricted-use period out.
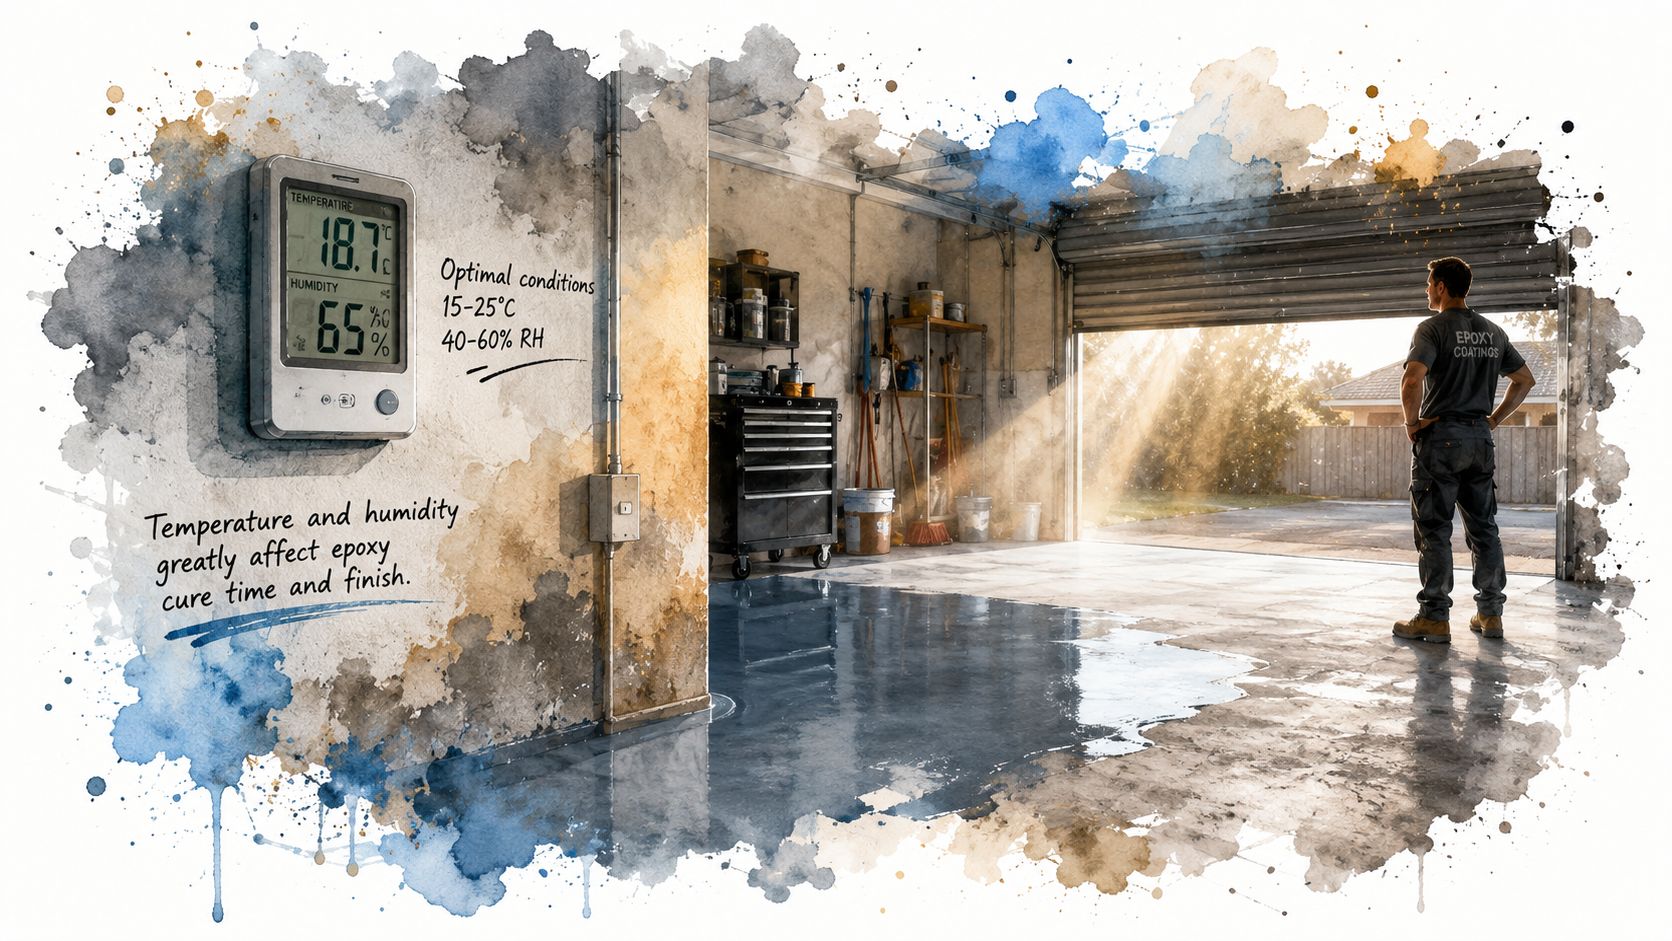
Australian installer guidance says epoxy may be ready for light foot traffic after 24 hours, that cooler garages can need 4 to 5 days before the coating is cured enough for use, and that a complete cure takes 10 days when temperatures sit below 77°F/25°C (Garagewerx post-installation instructions). That is the reality of a Melbourne winter, particularly where the slab stays cold overnight.
What to do with that information
Book the job when the forecast looks stable, not simply dry. Spring and early autumn give a contractor a better working window than a cold, damp week in July. A trade-qualified crew will also time the pour and the recoats around daylight, shade and temperature shifts, because a garage that is fine at 10 a.m. can be too cool by late afternoon.
DIY Versus Professional Install Timelines
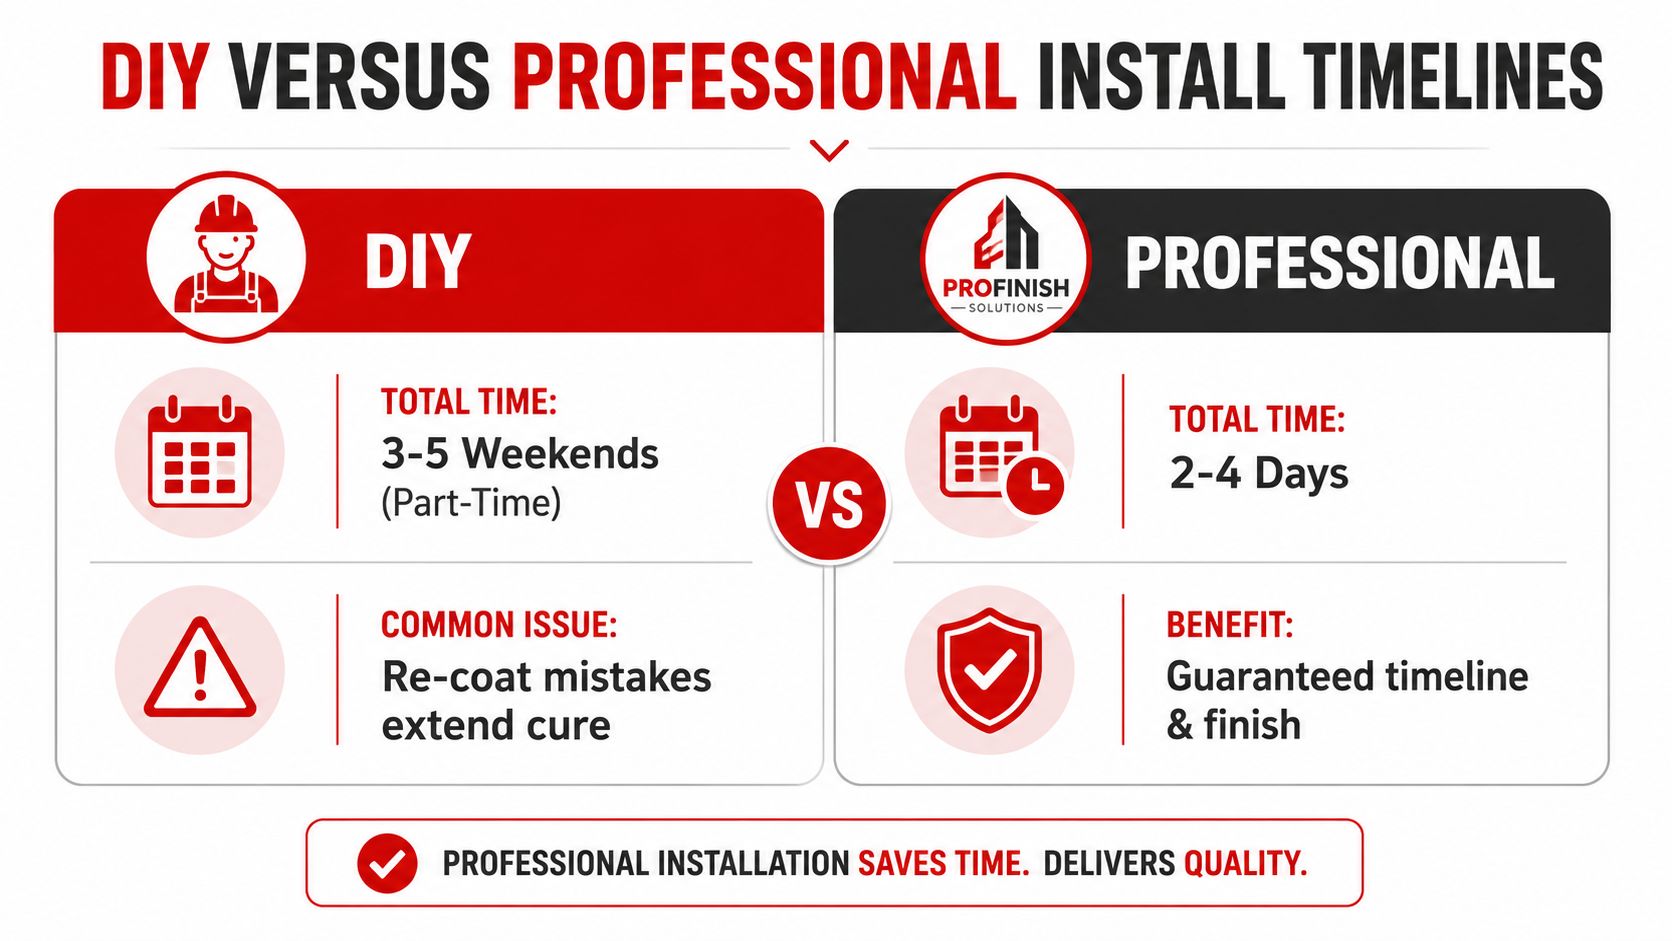
DIY usually takes longer, and the key difference is control. A homeowner working weekends can easily stretch the project across 3 to 5 weekends of part-time effort once prep, coating, recoats and cure windows are all counted. A professional crew often finishes in 2 to 4 days, because the sequence is coordinated, the grinder is already on site, and nobody is learning the system on your slab.
Why the professional timeline is shorter
A crew can split the work. One painter vacuums and masks, another handles the edge prep, a third mixes or broadcasts flakes. Epoxy runs to the coating window rather than to a one-person schedule, so the extra hands buy you hours you cannot get back any other way.
Equipment is the other advantage. Commercial grinder hire, dust extraction and mixing gear are already built into the job, so there is no gap between deciding to use the right machine and having the slab ready for it. The recoating window gets used properly instead of running overnight because somebody ran out of daylight.
Hard lesson: a floor that feels dry is not always ready for shoes, let alone tyres.
The biggest DIY risk is the false finish. A floor looks acceptable, the owner talks themselves into it, and then hot tyres lift marks out of a soft topcoat or a dragged box scars the surface. Repairs get expensive at that point, because the problem shows up after the crew of one has already packed away the tools.
For readers weighing the job up as a project, Newline Painting’s epoxy flooring installation cost page gives a practical view of labour, prep and downtime. Timeline and cost track the same variable, which is how much control the contractor has over the whole sequence.
Faster Coatings and What They Actually Trade Away
Faster systems can be legitimate, but the speed comes with conditions. Traditional epoxy usually needs about 7 days for a full cure, while polyaspartic and polyurea systems are often marketed for 1 to 3 day installs, sometimes with same-day walk-on or next-day vehicle use. Those claims hold up in the right chemistry and the right weather. They are not a universal shortcut for a Melbourne garage in winter.
Where faster systems make sense
A stable, warm garage with controlled moisture and a professional two-coat system can support a quicker return to service. That is why homeowners in Toorak or Hawthorn ask us about faster coatings. They want the garage back, and they do not want the floor sitting idle for a week.
Speed narrows the margin, though. Some faster systems cut the working time down, which leaves the installer less room for error during mixing and application. UV exposure comes into it as well in sun-drenched bayside garages, since a coating choice that behaves indoors can behave differently once the slab sees more daylight.
For a good comparison point on lifespan thinking, the Ottawa Stamped Concrete lifespan guide is a useful reminder that longevity depends on the system, the exposure and the maintenance rather than on the promise printed on the label.
What epoxy still does well
Traditional epoxy is often more forgiving on slab prep. Where the concrete needs a more careful profile, patching or moisture management, the slower system gives the contractor room to get the bond right. Plenty of Melbourne jobs still run on epoxy for that reason alone, rather than chasing the fastest available return-to-service window.
Ask which system suits this slab, this suburb and this use pattern. That question gets a better answer out of a contractor than asking what is fastest, and it tells you quickly whether anyone has looked at your floor or only at the price list.
Planning Your Two-Week Garage Downtime
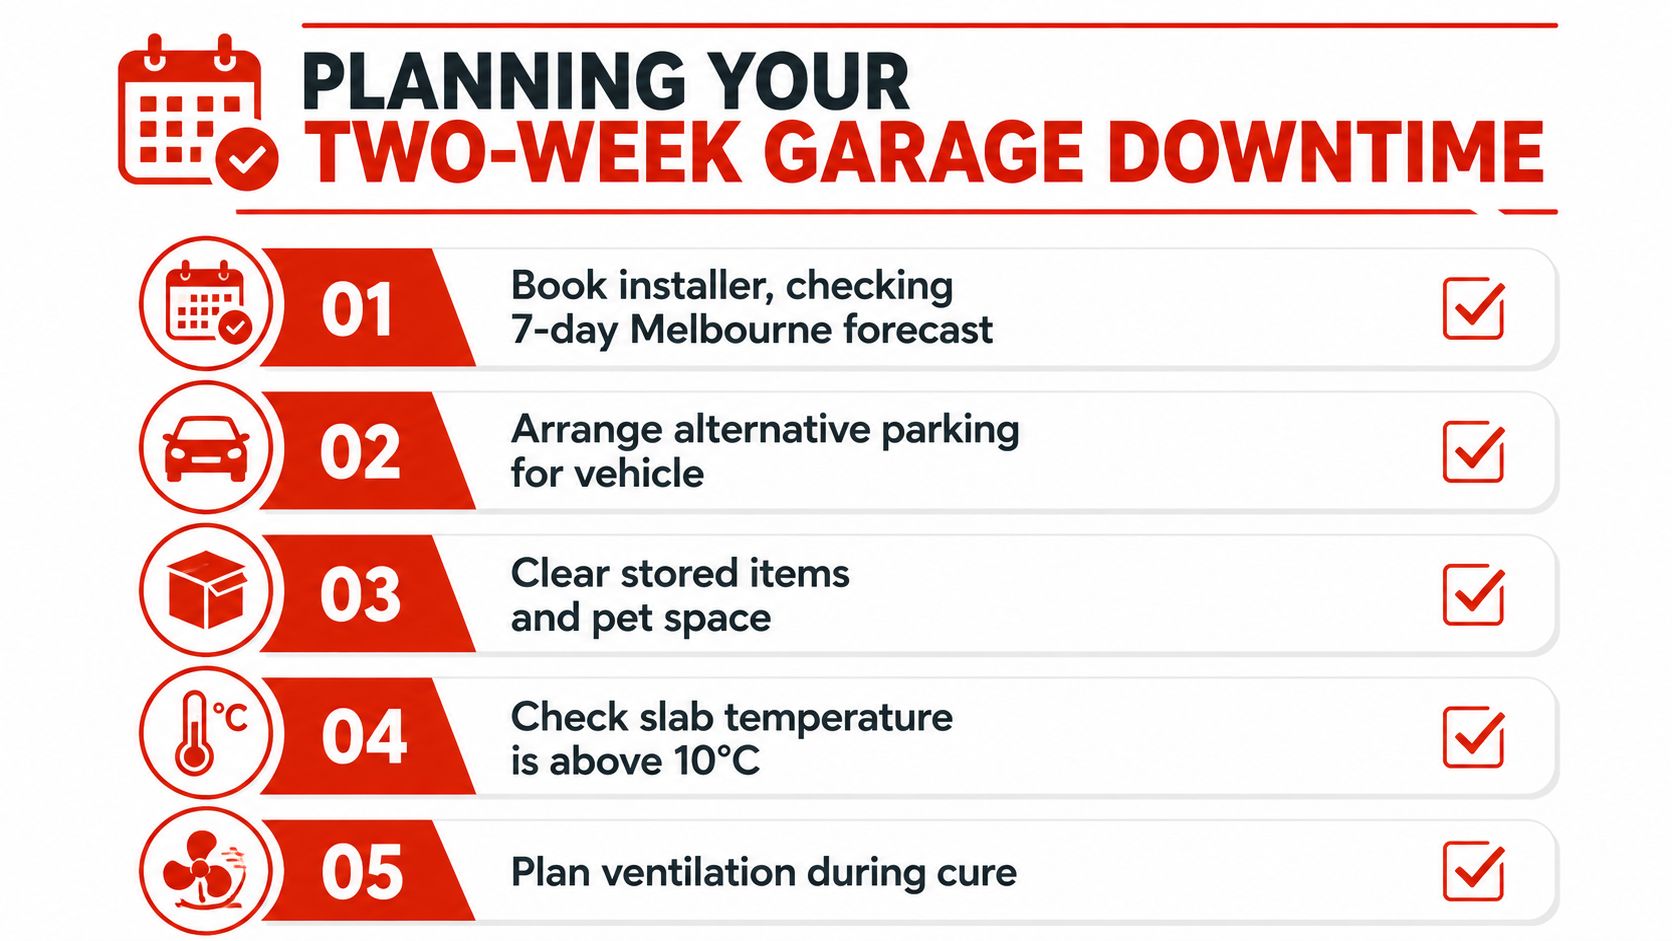
Plan on two weeks of disruption if you want the job to go smoothly. The coating may be walkable earlier, though the garage is still a work zone for the first week, and vehicle access usually waits for the cure to finish. In Camberwell or Malvern that means lining up street parking, shifting stored items, and making sure nobody in the household treats the floor as ready before it is.
A simple day-by-day approach
Book around the weather first, ahead of your own calendar. A stable forecast makes life easier for the installer and reduces the chance that a cold slab stretches the cure out.
Then clear the space properly. Vehicles, bikes, bins, shelving items, anything that might need to cross the floor during the first week. Pets need another route in and out, because one stray pawprint stays visible long after the finish hardens.
Check the slab temperature on the morning of the pour. The air can feel fine while the concrete is still too cold.
Do nots for the first 7 days
- No hot tyres: Park only when the contractor has confirmed vehicle use is safe.
- No dragging tools or storage tubs: Lift items instead of sliding them.
- No harsh chemical washing: Keep cleaners mild until the coating fully cures.
- No heavy jacks or stands: Concentrated load points can mark a soft surface.
- No sealed-up garage with no airflow: Keep ventilation moving during cure.
If the garage is your main parking spot, organise street parking or a temporary alternative before the crew arrives. That one planning step saves a lot of stress in the days when the floor is ready on paper and not yet ready for the car.
What to Look for in a Melbourne Epoxy Contractor
The right contractor should talk about prep, cure windows and slab conditions before they talk about finish. A written quote should spell out the surface preparation method, the coating system, the recoating window, and when the garage can return to foot traffic and to vehicles. Vague on those items usually means vague on the timeline too.
What separates a reliable quote from a loose one
Ask who checks the slab temperature on the day of the pour. That single step matters, because Melbourne weather can turn a straightforward job into a restricted-use week you had not planned for.
Ask whether the team knows the housing stock as well. A Victorian terrace in Richmond, a Federation home in Kew and a newer townhouse in Northcote do not behave the same way during prep, masking or ventilation, and a contractor who works across all three formats will plan the job better.
Newline Painting is a Melbourne-based team with a 7-year workmanship warranty, $20 million public liability insurance, and trade-qualified painters who work across garage epoxy and broader repainting jobs. A floor coating is a managed process with accountability attached to it after handover, and that accountability is what a homeowner is actually paying for.
What to confirm before you book
- Prep standard: Ask how the slab will be ground, repaired, and dust-managed.
- System selection: Confirm the exact epoxy or coating system being used.
- Timing windows: Make sure the quote states when you can walk on and park on the floor.
- Warranty and insurance: Check that the contractor stands behind the work in writing.
- Site handover: Look for a final walkthrough and clear aftercare instructions.
If you want a garage floor plan matched to your slab and your suburb, request a free on-site quote from Newline Painting or call 1300 044 206. A proper site visit gives you a timeline you can park a car against.