Painting your home interior is a sure-fire way to freshen up the decor and transform your home from drab to fab in no time.
However, one of the most important steps, and one that amateur painters often overlook, is to make sure your home is properly prepped before painting. Before you dive right in and start painting the interior of your home, you will need to follow these simple steps to ensure the interior surfaces are ready for painting.
Adequately preparing before painting your house will allow for smoother, professional-looking results and help the paint last longer, so it will last for years to come.
 Before you even think about painting your home, you need to make sure you have the all the right equipment and tools to get the best results. After all, a tradesman, or painter, is nothing without his tools.
 Although it might be tempting to just paint over mildew and mould, you should refrain from doing so as it will simply grow back.
Mildew tends to be white, grey, or yellowish in colour, with a powdery and fluffy texture. Mould, on the other hand, tends to be black, brown, or green, with a slimy, fuzzy appearance. Both are harmful to your health, as they can cause allergic reactions, and can significantly damage your property.
Therefore, you should always treat mould and mildew right away to avoid potential risks to your family and your home. Always make sure to protect yourself with the right personal protective equipment (PPE) when treating mildew and mould and make sure there is adequate ventilation in the room.
Not sure how to best tackle mould and mildew? We’ve concocted our own homemade removers for those who don’t like to use harsh chemicals, like bleach.
Although it might be tempting to just paint over mildew and mould, you should refrain from doing so as it will simply grow back.
Mildew tends to be white, grey, or yellowish in colour, with a powdery and fluffy texture. Mould, on the other hand, tends to be black, brown, or green, with a slimy, fuzzy appearance. Both are harmful to your health, as they can cause allergic reactions, and can significantly damage your property.
Therefore, you should always treat mould and mildew right away to avoid potential risks to your family and your home. Always make sure to protect yourself with the right personal protective equipment (PPE) when treating mildew and mould and make sure there is adequate ventilation in the room.
Not sure how to best tackle mould and mildew? We’ve concocted our own homemade removers for those who don’t like to use harsh chemicals, like bleach.
 We recommend that you remove all traces of wallpaper and adhesives must be removed before painting. If you paint directly over old wallpaper, you might experience curling, staining or uneven surface problems.
To remove wallpaper, soak, scrape or steam the wallpaper. Scrub off any glue, rinse and dry thoroughly. Be sure to repair all gouges, cracks, and uneven surfaces before painting.
Painting over wallpaper
However, if you must paint over wallpaper, here are some tips to help you get the best results:
We recommend that you remove all traces of wallpaper and adhesives must be removed before painting. If you paint directly over old wallpaper, you might experience curling, staining or uneven surface problems.
To remove wallpaper, soak, scrape or steam the wallpaper. Scrub off any glue, rinse and dry thoroughly. Be sure to repair all gouges, cracks, and uneven surfaces before painting.
Painting over wallpaper
However, if you must paint over wallpaper, here are some tips to help you get the best results:
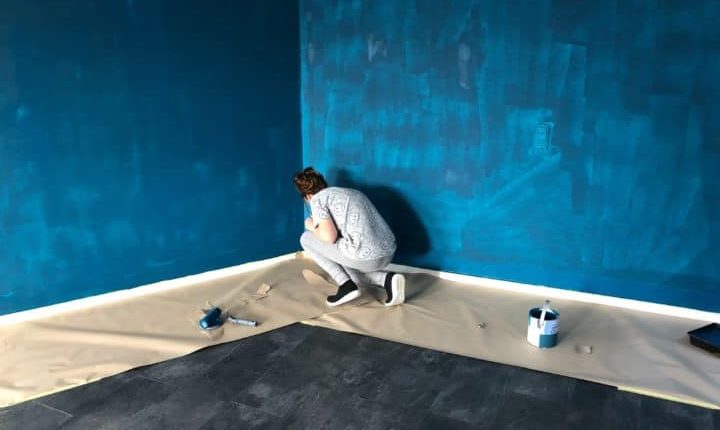
How to prepare the interior for painting
Before you even think about painting your home, you need to make sure you have the all the right equipment and tools to get the best results. After all, a tradesman, or painter, is nothing without his tools.
What you’ll need:
- Filler and filling knife
- Painter’s tape
- Selleys Sugar Soap
- Sponge
- Sandpaper
- Scraper
- Paintbrush (60mm)
- Drop cloth
1. Clean surfaces before painting
An artist wouldn’t start painting his masterpiece on a soiled canvas and the same holds true for the interior of your home. Before you even reach for your paintbrush, you’ll need to clean the walls and any surfaces you plan to paint as part of your project. This will give you a smooth, blank surface to paint and long-lasting results. Here’s a step-by-step guide on how to clean an area for painting:- Remove all furniture, curtains, and any wall hangings
- Cover large pieces of furniture (that you cannot move) with a drop cloth
- Vacuum and dust the surfaces, using a microfibre cloth, damp sponge and long-handled duster to reach ceilings and walls, and a step ladder if necessary
- Wash surfaces with Selleys Original Sugar Soap to remove stubborn dirt, grime, and grease marks
- Wipe away any sugar soap residue with a damp sponge and allow to dry before painting
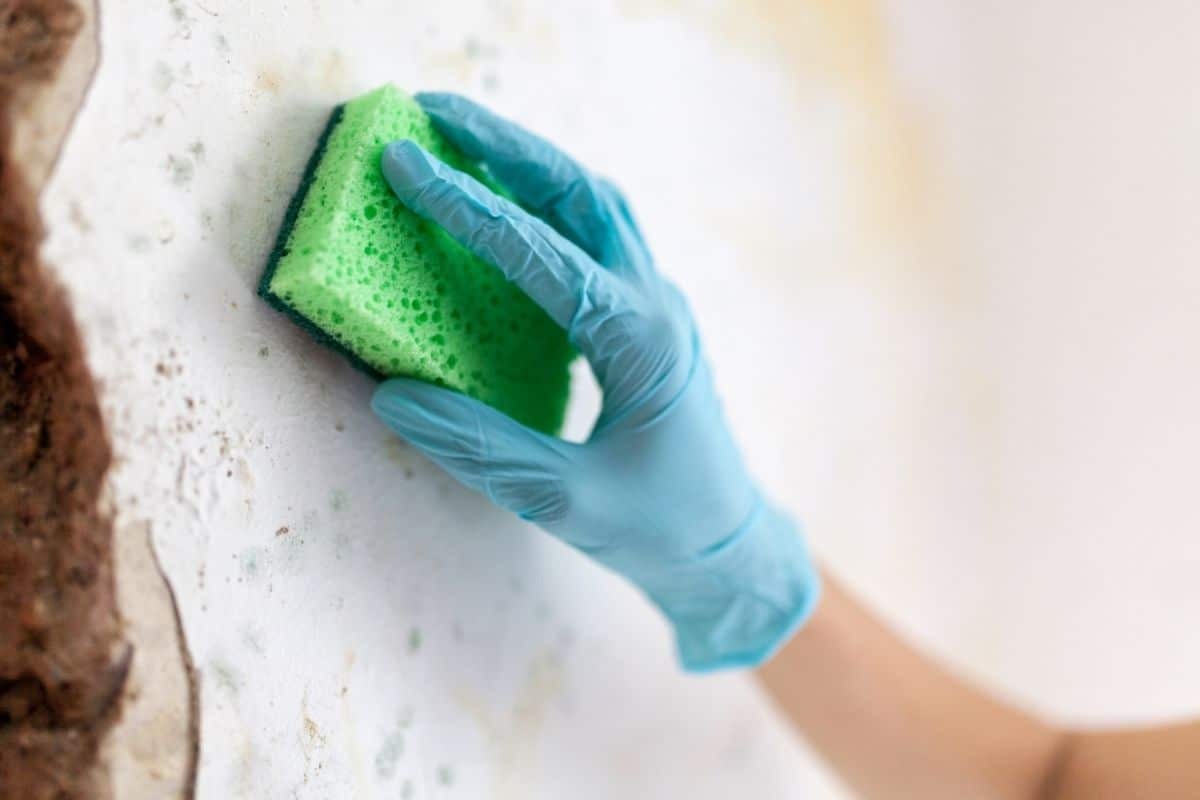
2. Get rid of mildew and mould
Although it might be tempting to just paint over mildew and mould, you should refrain from doing so as it will simply grow back.
Mildew tends to be white, grey, or yellowish in colour, with a powdery and fluffy texture. Mould, on the other hand, tends to be black, brown, or green, with a slimy, fuzzy appearance. Both are harmful to your health, as they can cause allergic reactions, and can significantly damage your property.
Therefore, you should always treat mould and mildew right away to avoid potential risks to your family and your home. Always make sure to protect yourself with the right personal protective equipment (PPE) when treating mildew and mould and make sure there is adequate ventilation in the room.
Not sure how to best tackle mould and mildew? We’ve concocted our own homemade removers for those who don’t like to use harsh chemicals, like bleach.
Mildew remover
- Mix two tsp borax with ½ cup white vinegar in a spray bottle
- Spray liberally on affected surfaces
- Leave for 30 minutes
- Rinse with clean water
- Leave to dry completely
Mould remover
- Combine one-part water with an equal part white vinegar in a spray bottle
- Spray liberally on affected surfaces
- Leave for 30 minutes
- Rinse with clean water
- Leave to dry completely
Tough black mould remover
- Create a paste by mixing two parts baking soda with one part vinegar and one part water
- Rub affected areas with baking soda paste
- Leave for 30 minutes
- Rinse with clean water
- Leave to dry completely
3. How to prepare glossy surfaces for painting
Paint cannot stick to glossy, shiny surfaces, which means you will need to sand it down first to remove the gloss before painting. Before you start sanding, always clean the surface first to remove any surface dirt and grime using the aforementioned cleaning tips. Sandpaper with fine grit such as #180 or #220 is effective for sanding interior walls and surfaces. You can use a chemical deglosser if you don’t want to sand your walls, but you must read the instructions carefully beforehand and do a spot test on the before you go ham on the wall. When using chemical compounds, always ensure you have good ventilation and wear adequate PPE gear to protect yourself.4. How to prep bare timber to paint
During your preparation process make sure you first check bare timber surfaces for mildew and mould. Then, clean the surfaces using a damp sponge and soapy water. Once you’re satisfied that the surface is clean, you can fill in any holes or gaps with fillers, which we touch on more below. If the wood surface is rough, you will need to sand it down first before you paint using a medium grit sandpaper (#100 or #200). For smoother results, sand it again with a fine grit sandpaper, wiping away dust with a dry rag. If the timber surface is not stained, you can follow these steps to achieve a smooth appearance:- Apply a thin film of water to the wood with a damp rag
- Leave to dry for 30 minutes to raise the grain of the wood
- Sand with a fine garnet sandpaper
- Apply stain-blocking acrylic paint primer and dry overnight
- If staining is still evident, you can apply a second coat of primer
- After the primer is dried, you can gently sand the surface with fine grit sandpaper to achieve a smoother surface
5. Prepping unpainted surfaces
All unpainted surfaces must be sanded smooth, dusted, and cleaned before you start painting. Once you’ve thoroughly dusted and cleaned the surface you should apply an acrylic sealer or undercoat to the surface. This will help to fill any minor imperfections to create a smooth, even-coloured surface ready for the application of the topcoat.New plaster
New plaster must be dried thoroughly before it can be painted. Depending on the amount of patching done and the weather conditions, the area may take anywhere from one day to a week to dry. Be sure to clean the surfaces before you apply an oil-based undercoat or acrylic sealer and wear PPE to protect yourself when handling harsh chemicals.Tiles
Tiles will need to be inspected, repaired, and cleaned before painting. You can wash the tiles with washing detergent and warm water and use dedicated cleaning products to treat and remove any mould and mildew. If you’re after ultra-smooth results, then you can also lightly sand the tile surfaces with a fine aluminium oxide sandpaper (#220) to achieve a smoother surface for painting. As always, ensure you clean the tiles before you apply any primer and protect yourself by wearing appropriate PPE and ensuring the room has plenty of ventilation.6. Repainting already painted surfaces
If you’re planning to repaint already-painted surfaces, then the first thing you’ll need to do is inspect for cracks, peeling, flaking or loose paints. Depending on the amount of damage, you can use any one of the following methods below:- Scraping – is a traditional method and is suitable for most flat surfaces from plaster to wallboard to wood and ferrous materials. Use a triangle-shaped scraper for maximum results around corners and curves. When scraping, take extreme care not to damage, gouge or score the surface. Finish by sanding off with medium grit sandpaper. Dust and clean the surface before painting.
- Brushing – Use a wire or bristle brush to loosen and remove old paint. Take care not to damage the substrate when brushing. We recommend using a stiff bristle brush rather than a wire brush for this purpose. Always finish by sanding with medium grit sandpaper and dust and clean the surfaces before painting.
- Sanding – is effective if the surface paint is already slightly flaky. Sand the papers with progressively finer grit sandpaper starting with coarse, then medium and finishing with a fine grit.
- Chemical paint removers – You can use chemical paint removers to speed up the task. Always read the manufacturer’s instructions carefully before you attempt any chemical paint removers on surfaces.
7. How to prepare to paint over wallpaper
We recommend that you remove all traces of wallpaper and adhesives must be removed before painting. If you paint directly over old wallpaper, you might experience curling, staining or uneven surface problems.
To remove wallpaper, soak, scrape or steam the wallpaper. Scrub off any glue, rinse and dry thoroughly. Be sure to repair all gouges, cracks, and uneven surfaces before painting.
Painting over wallpaper
However, if you must paint over wallpaper, here are some tips to help you get the best results:
- Check for loose pieces of paper and open seams. Re-glue these problems.
- Conduct a test on a small inconspicuous part of the room to see if the paint looks good over the wallpaper. Include a seam as your test area.
- Apply an oil-based, stain-blocking primer. Use PPE and ensure adequate ventilation when handling primers
- Leave to dry overnight
- Inspect for staining or discolouration after drying
- Apply a second coat if necessary
- Apply a layer of test paint to a small area and allow it to dry completely
- Inspect the test site. If you are happy with it then apply a second layer of paint and allow it to dry again.
- Only paint the entire room if you are completely satisfied with the final appearance.
8. Smooth surfaces using filler
For a smoother, professional finish to your walls, use a filler to fill any holes or cracks. Here are some simple tips for using fillers:- Clean and dry the surface
- Scrape away loose paint or plaster
- If there are unstable edges in holes, or if the holes are large, use a self-adhesive patch to repair the damage before using filler
- Apply a layer of filler over the area; making sure to cover all holes and cracks as you go
- Spread the filler across the area in multiple directions
- Once the entire area is covered, use a single downward stroke to remove access filler
- A quick wipe with a damp sponge before the filler dries can smooth out the surfaces and you may not need to sand it after drying
- When dried, inspect the surface
- Sand to remove any unevenness
- Clean and dust before painting
9. Use painter’s tape for clean lines
It’s a general rule of thumb that you should tape before painting to ensure neat painting results, with clean lines and no messy edges. Opinion is divided as to whether it’s simply a giant waste of time, but we always suggest you use it – especially if you’re a novice painter and haven’t had the chance to hone your painting skills just yet. Here are some useful tips on how to use painter’s tape:- Cover any areas you don’t want to paint with painter’s tape, like light switches, window frames and doors
- Push the edges of the tape down firmly to ensure even edges
- Remove painter’s tape at a 45% angle before the paint dries completely
- If the paint has dried before you can remove the painter’s tape, gently lift the tape with a fine blade